
The Optimizer is a highly useful tool for media buyers that launch hundreds of ad campaigns simultaneously, as well as for advertisers with few campaigns. Since the Optimizer not only saves you time, analyzing each ad spot individually but also allows you to target a broader range of sources and test new ones while using your budget wisely.

How to set rules?
Sign in to your TrafficStars account and go to the Optimizer tab. Then click here to create a new optimizer. Here are the rules settings. Everything is quite simple. You set the rules for which the traffic source, ad creative, or another target will be blocked, in other words, added to the blacklist.
Choose one of the targets, then a value: Less than, More than, or Equal to and enter numbers.
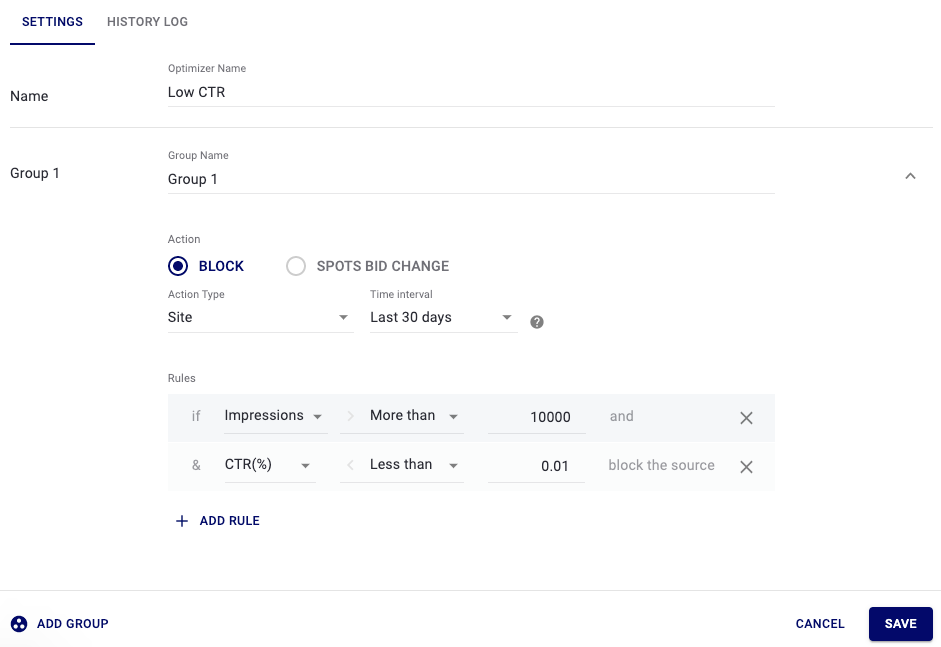
In this case, the Site will be blacklisted if the CTR of the ad creative is below 0.01% and the number of impressions is greater than 10,000. You can add as many rules as you want. Save it.
Now, go to the campaign to which you want to apply the rules.

Add an optimizer from the list. Save campaign.
You can link optimizers with already running ad campaigns. They will not be stopped for moderation.
How to track the performance?
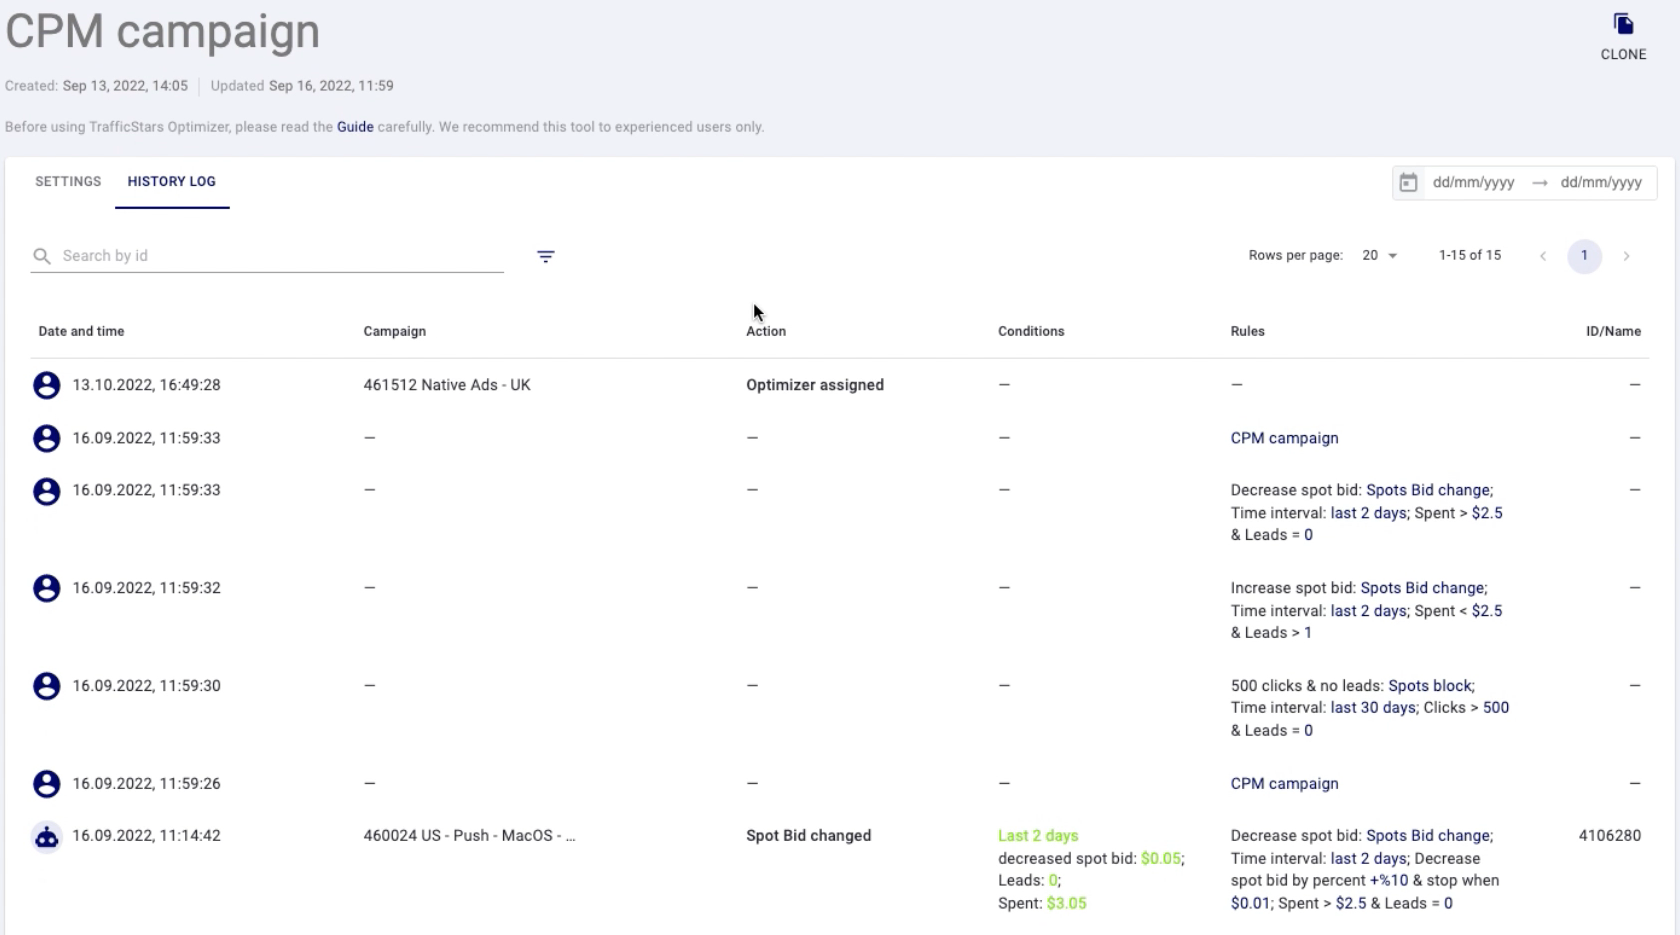
You can track the performance of the Optimizer in the HISTORY LOG tab. Here you can find detailed information about campaigns linked with the rules, events that triggered the rules, etc.
What are the best practices for using optimization rules?
CPL Offer
Let’s say, you promote CPL offer and you get $1 per lead, buying traffic on CPM model.
Name the optimizer and groups.
Group 1
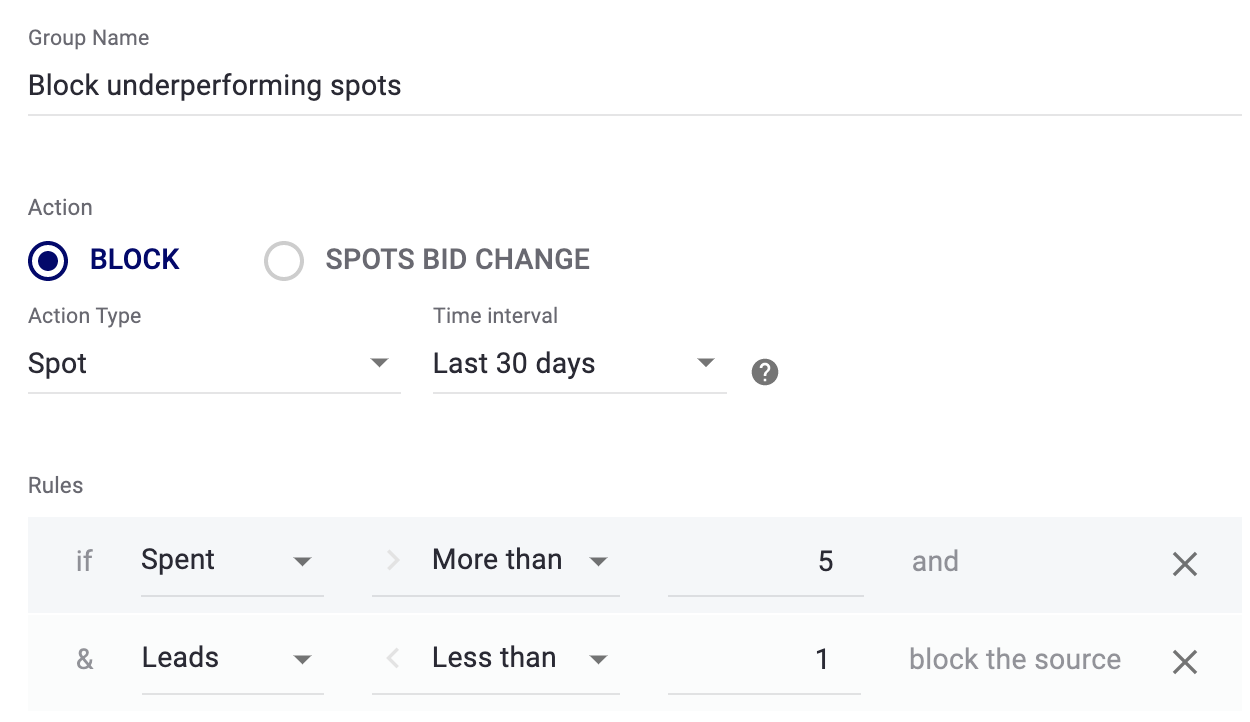
In the first group, set up rules to block underperforming ad spots that have spent 5X the lead cost ($5).
Group 2
In the second group, block ad spots with a too-high eCPA. eCPA is calculated by dividing the total cost of conversions by the total number of conversions. In other words, the ad spot brings you conversions, but the cost per lead is unprofitable.
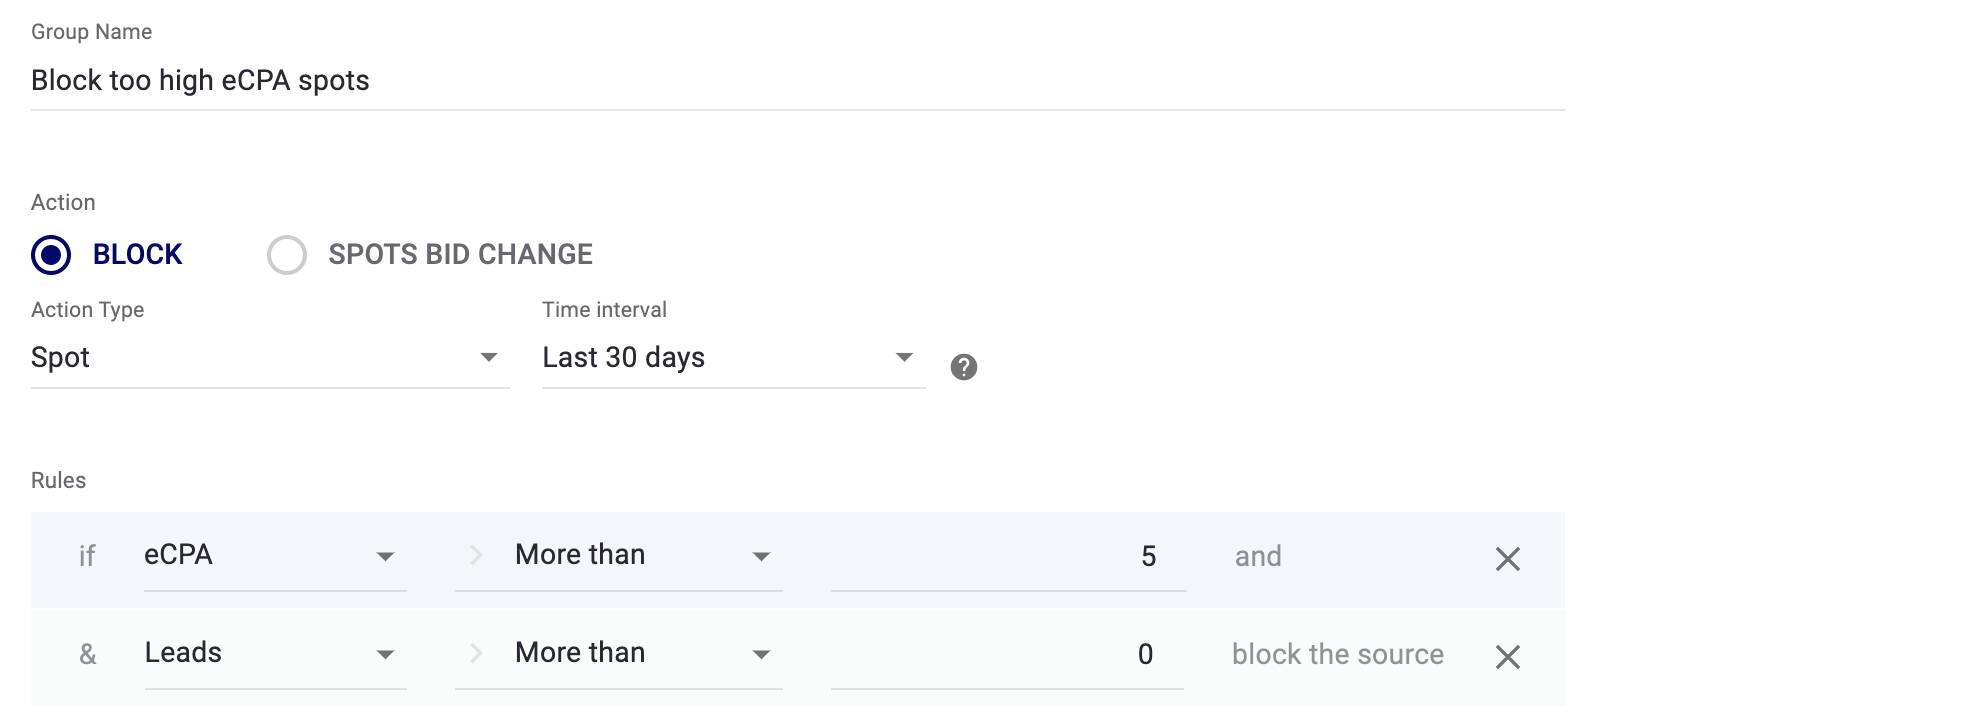
So in this case the optimizer blacklists ad spots with eCPA higher than $5.
Group 3
In the 3rd group block ad creative with a low CTR after getting 10,000 impressions.
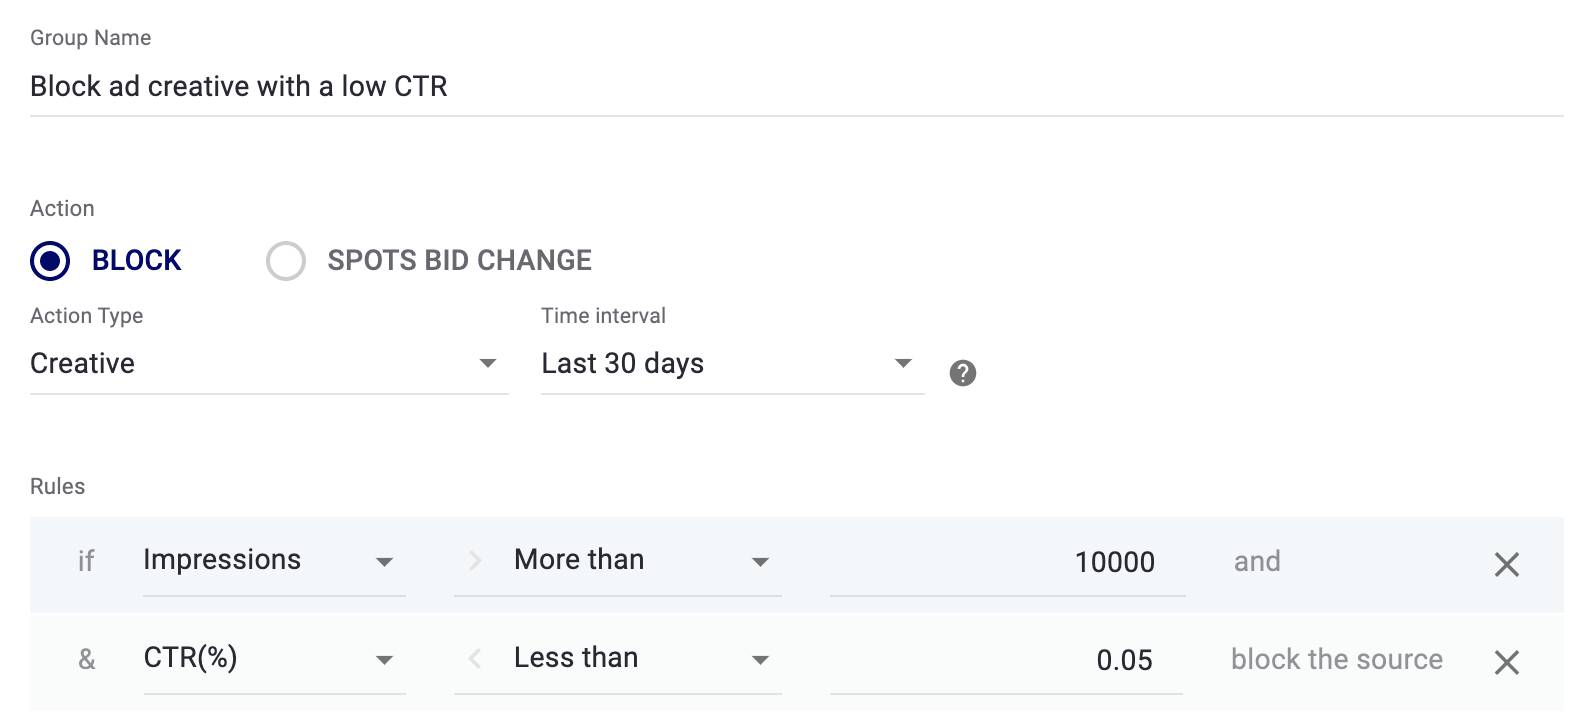
💡 Analyze your stats, after getting enough data, and find the average click-through rate on your campaigns.
These groups of rules can be applied to cases when the cost of a lead is important to you and you buy traffic on CPM.
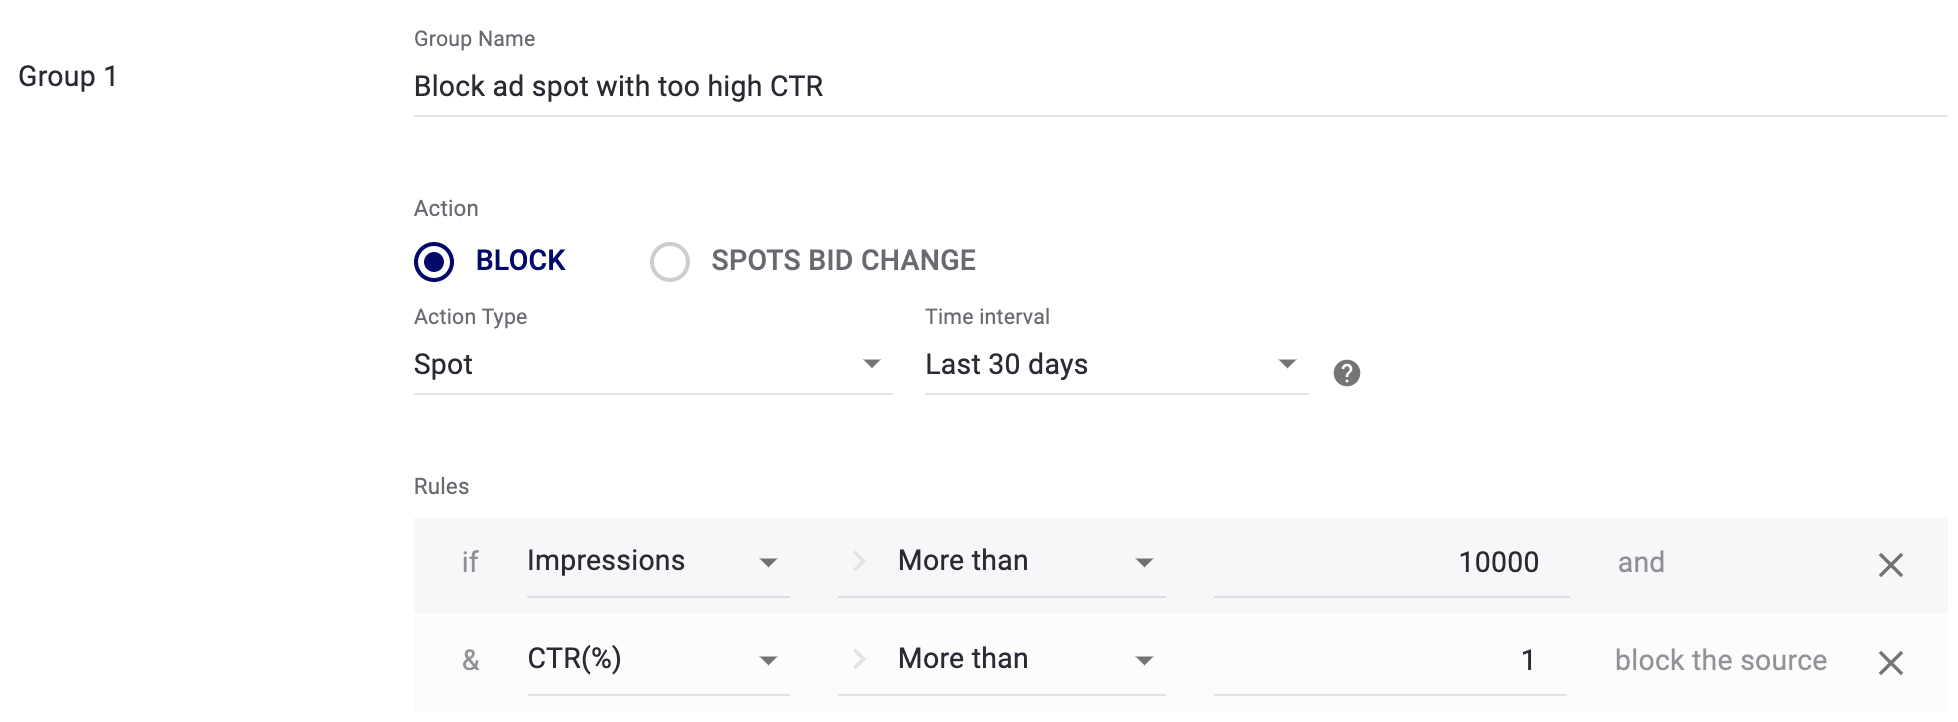
For CPC campaigns it makes sense to block ad spots with a ridiculously high CTR to avoid overspending.
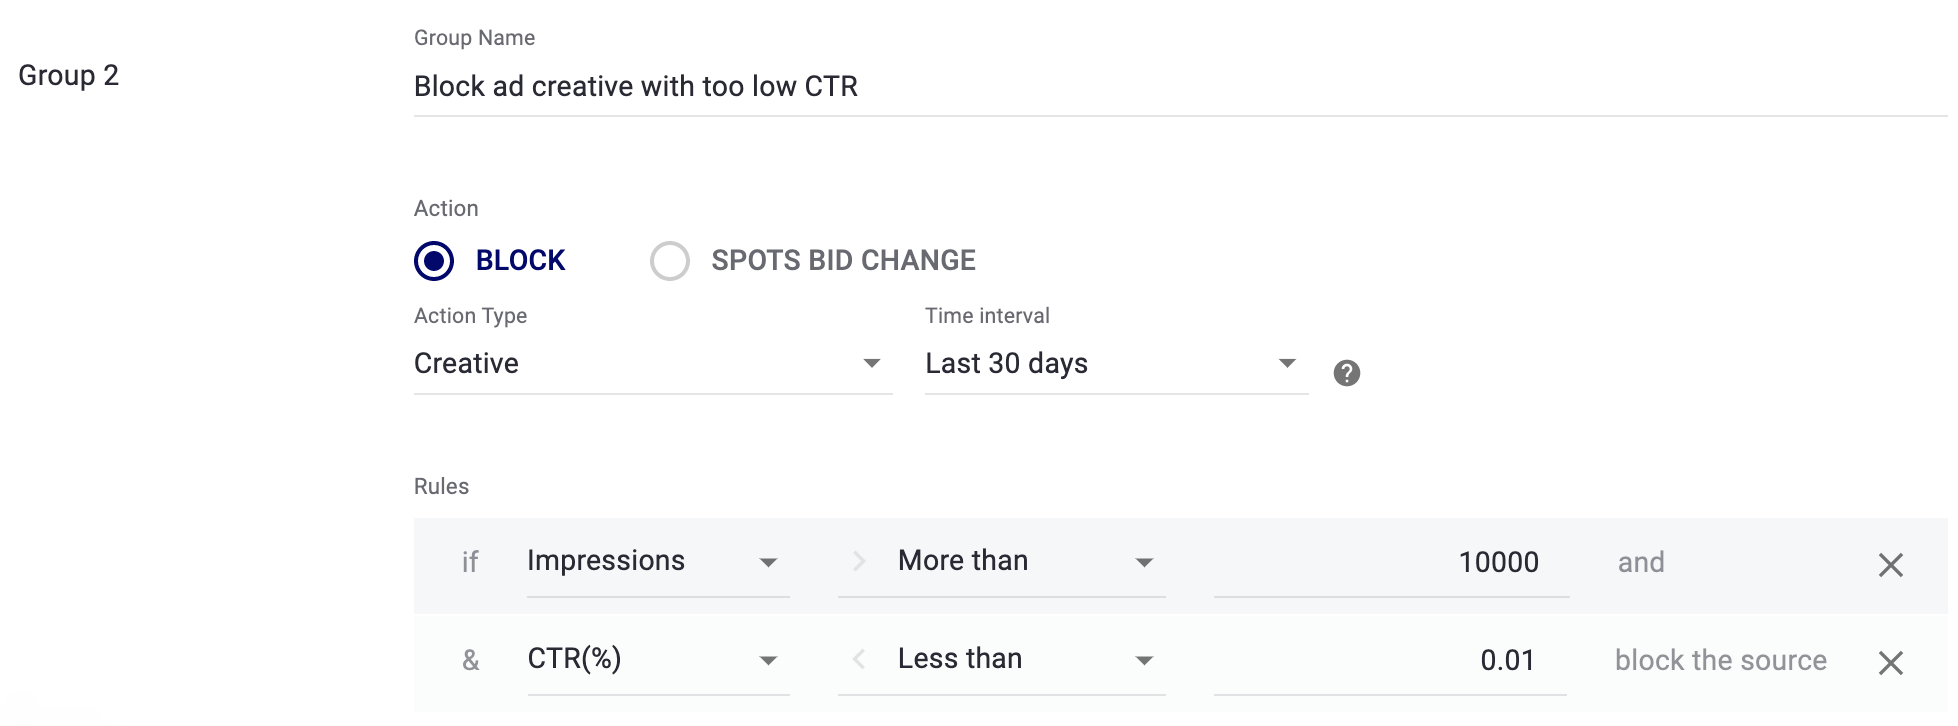
For ad creatives, on the contrary, it makes sense to block creatives that have too low CTR.
💡 After the campaign has worked at least for 1 week, you can collect a list of ad spots or sites that bring conversions and launch a campaign using a whitelist.
Auto-bidding optimization
Besides blocking ad spots and targets., you can adjust your campaign bid. So you can set up a rule by which the bid will be changed.
Create an optimizer with auto-bidding.
Pick the SPOTS BID CHANGE.
Time interval – is the past period, based on which the Optimizer analyzes the statistics.
Frequency – is the rule check frequency. That is, how often the Optimizer will check and apply the rules.
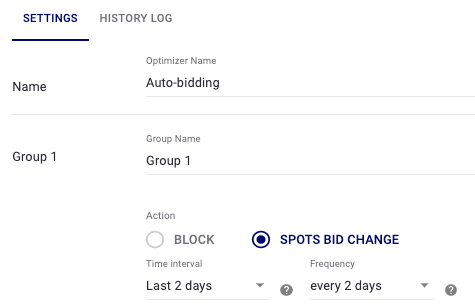
We recommend that you set the same time interval and frequency of bid changes. However, you can test different options that will suit best your goals and needs.
Let’s say your target eCPA is $2 and you get one conversion every 2 days on average. Then it makes sense to set up the time interval and the frequency at 2 days.
First, set up the rule for increasing the bid.
Group 1
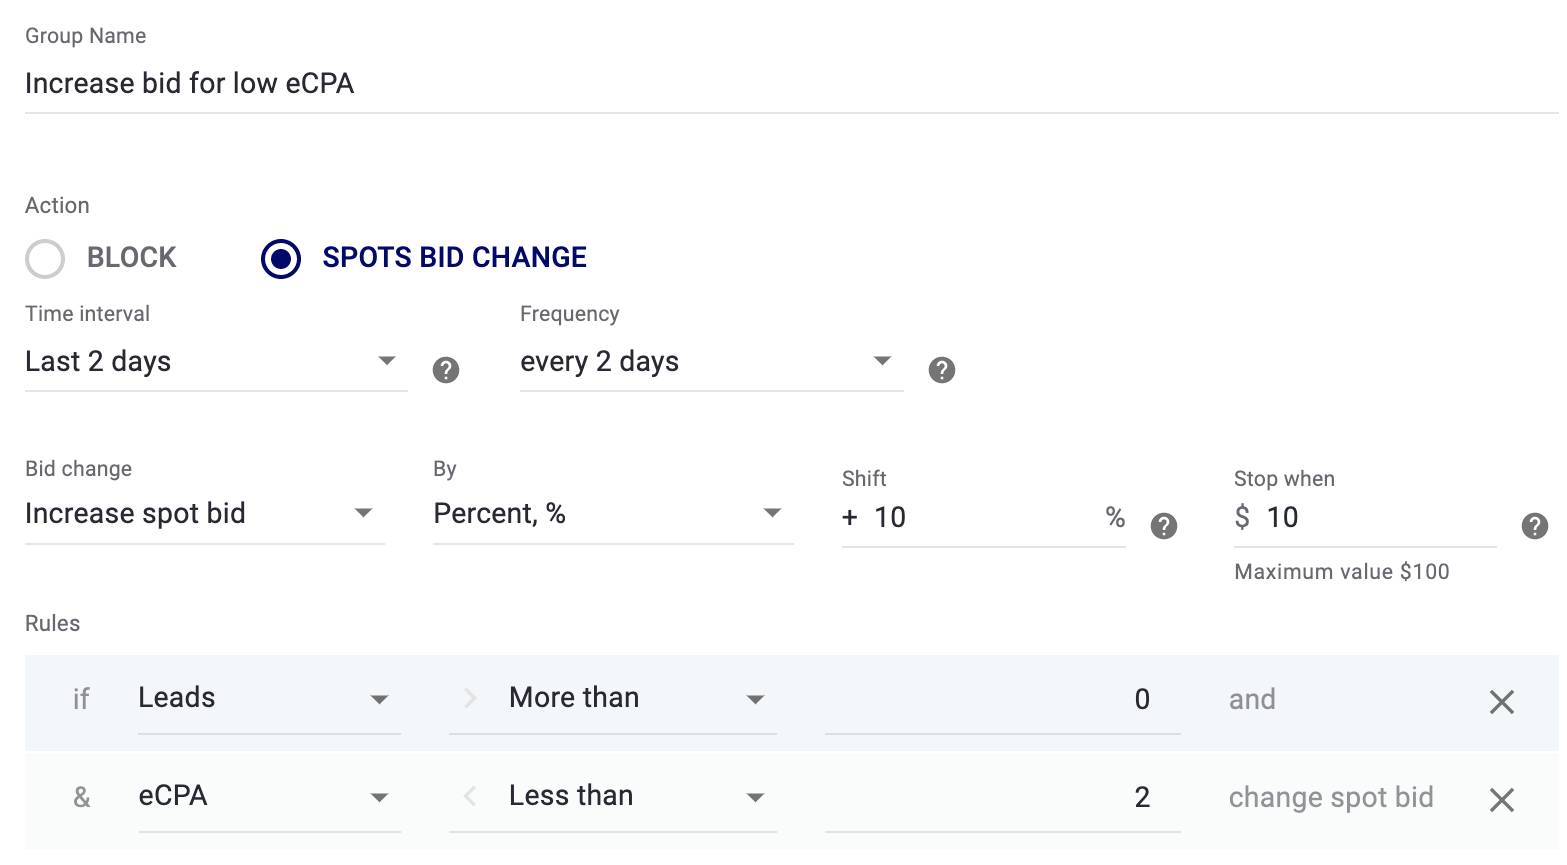
This rule means that if the eCPA on an ad spot is less than $2, the campaign will get more traffic by raising the bid. On the contrary, the price for spots with high eCPA or no conversions should be decreased. This is what I will add to the next group of this Optimizer.
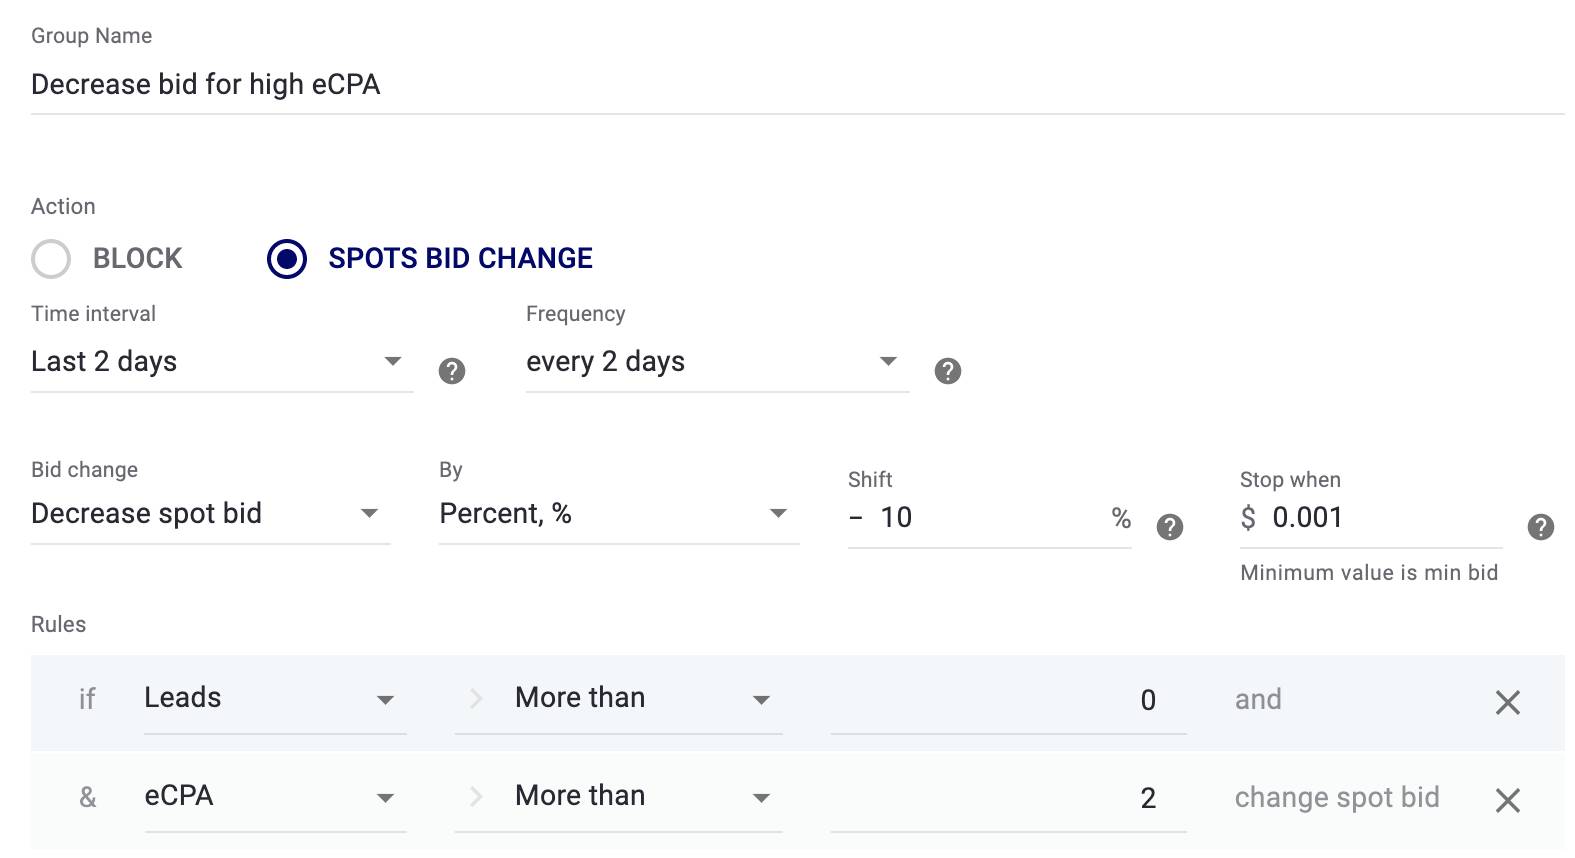
Group 2
If there are leads, but eCPA is too high (more than $2), then the spot bid will decrease by 10%.
Group 3
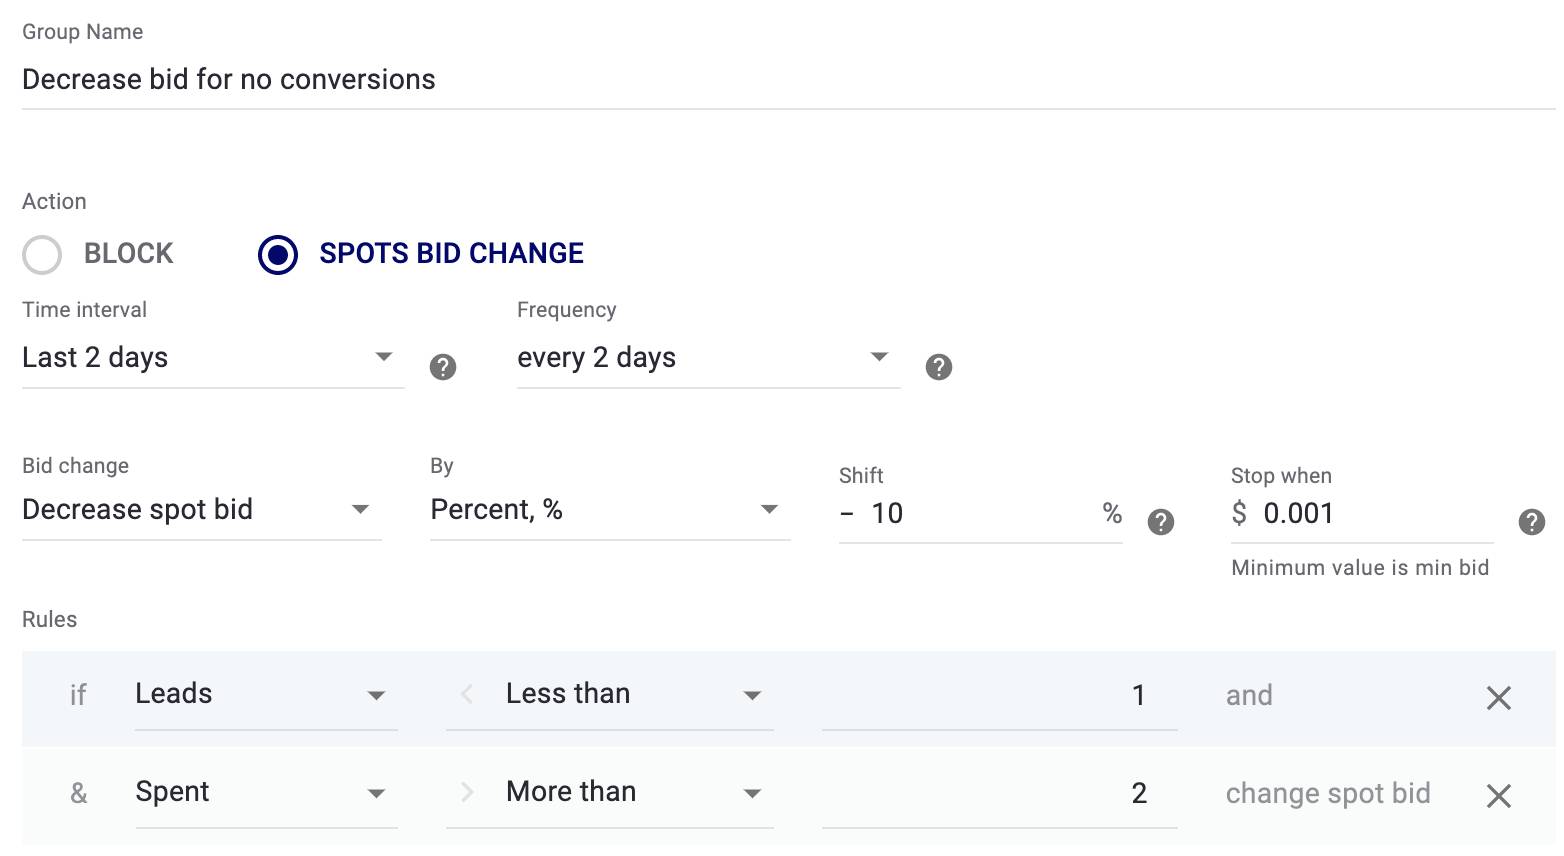
By the third group, decrease the bid, if there are no conversions.
Group 4
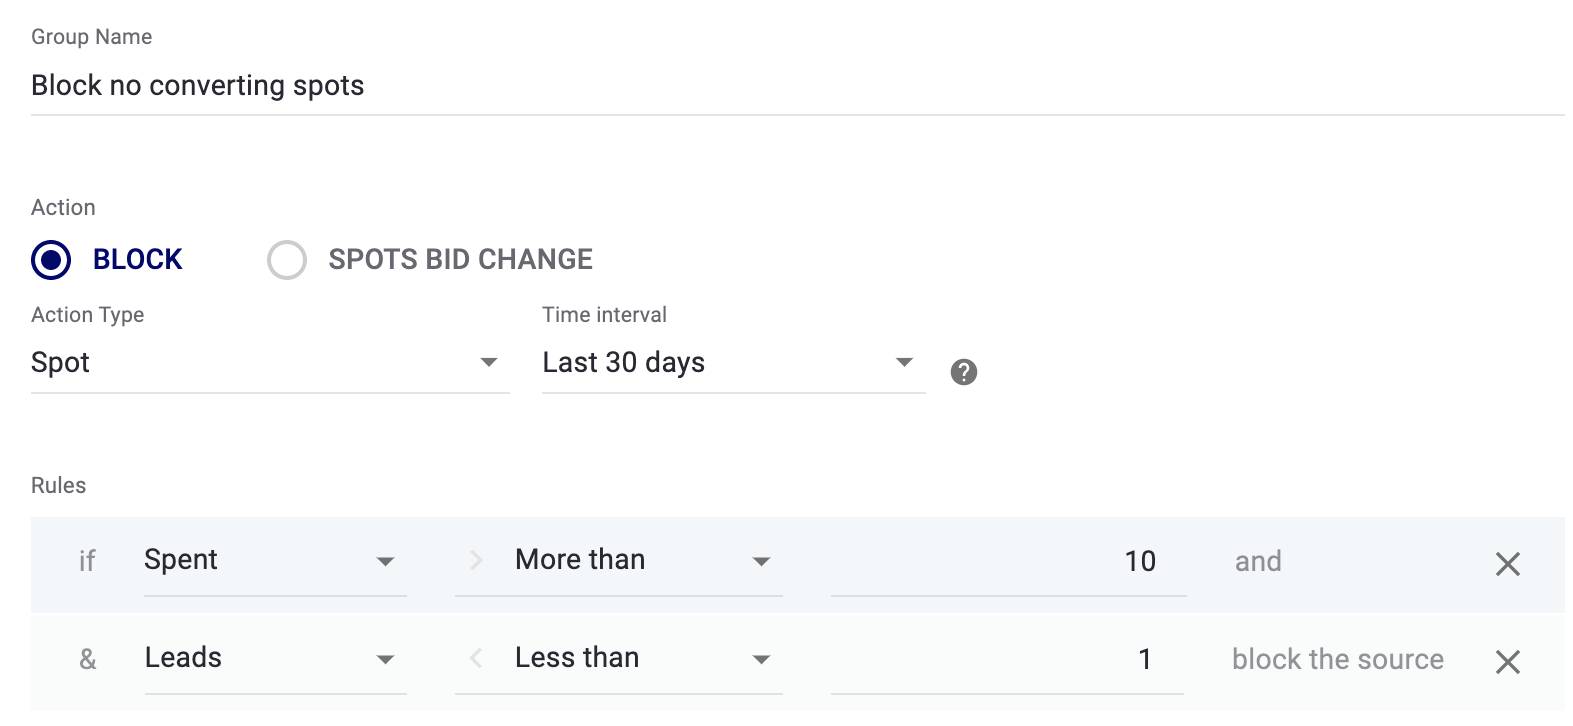
And by the 4th group, block non-converting ad spots.
Save the optimizer and apply it to your ad campaigns.


 (1).jpg)
.jpg)