For those using Voluum, a leading tracking platform, integrating it with Traffic Stars can unlock powerful insights into campaign effectiveness. This article provides a step-by-step guide on how to set up conversion tracking with Voluum on Traffic Stars, ensuring you can track and analyze your campaigns with precision.
Step 1. Add an affiliate network to Voluum
Open your Voluum account and click on the Affiliate networks tab. Click the create button and select Affiliate network from the drop-down menu. Choose an affiliate network from the list, or create a custom one. Details can be found in the Voluum guide. If an affiliate network has already been added, then skip this step.
Step 2 Add an offer to Voluum
Open the Offers tab, click the Create button and select Offer.
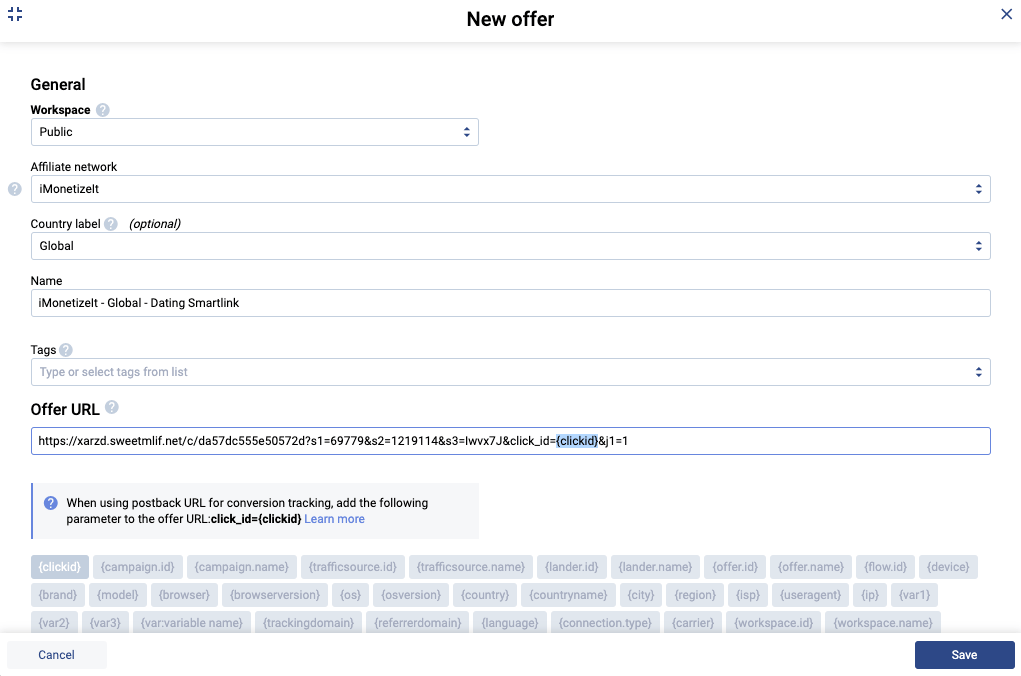
Here select the affiliate network, country label, give it a unique name and add the URL you are going to promote. Add the {clickid} token to track conversions. Then set up a postback in your affiliate network. Enter the payout amount and select the currency (if needed). And click Save.
Step 3. Add traffic source to Voluum
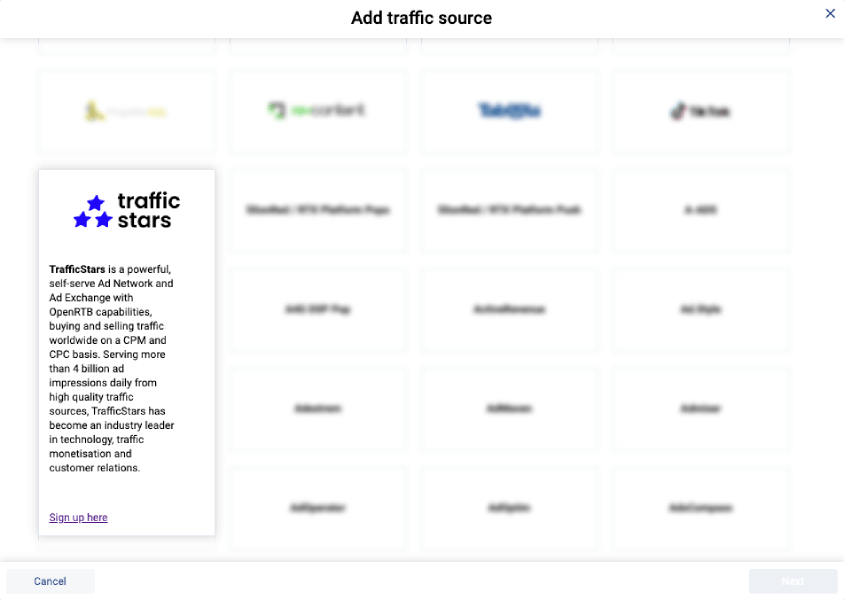
Go to the Traffic source tab and create a new one. Select TrafficStars from the list of ad networks and click Next. Here is a template with all supported tracking options. The only thing that needs to be fixed is the postback.
Log in to TrafficStars, go to the Goals & Postbacks tab. Switch to Advanced mode and select all options.
Select Volume, give it a name and click Generate.
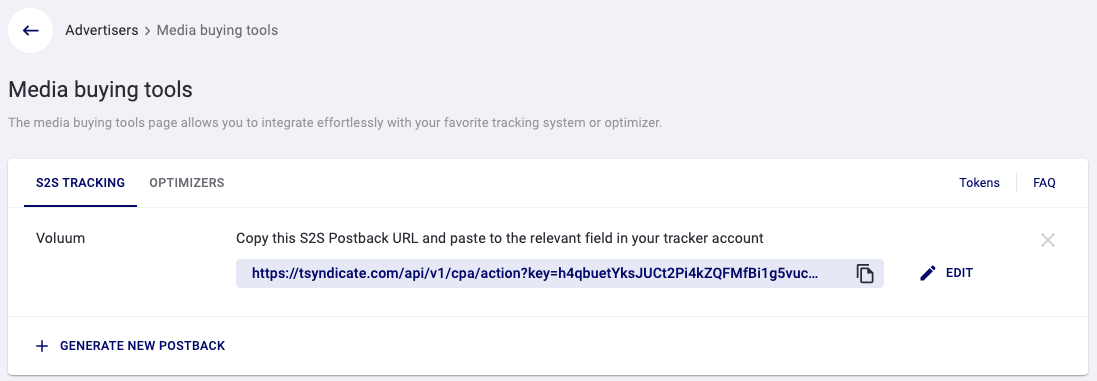
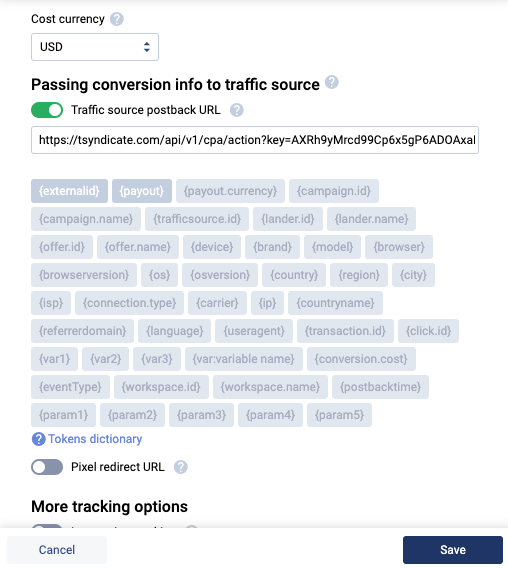
Next, copy our postback and paste it in the campaign settings in Voluum.
Step 4. Create a Voluum campaign
Click the Create button on the Campaigns tab and select Campaign simple. Select TrafficStars as your traffic source. Come up with a name. Select the desired pricing model and enter the payout amount if you know it. If not, you can edit it later.
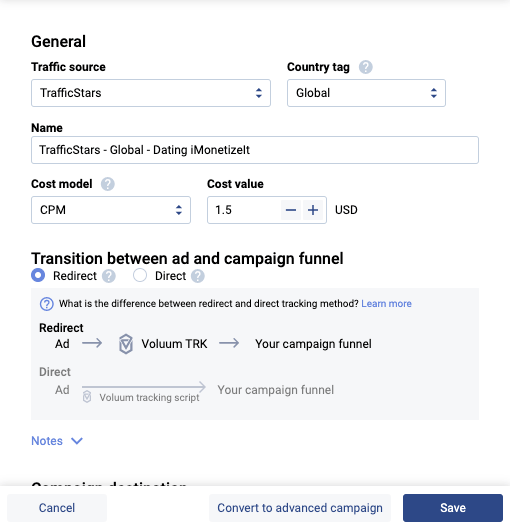
Click Next. Copy the campaign URL, it will be used in the next step.
Step 5. Create a TrafficStars campaign
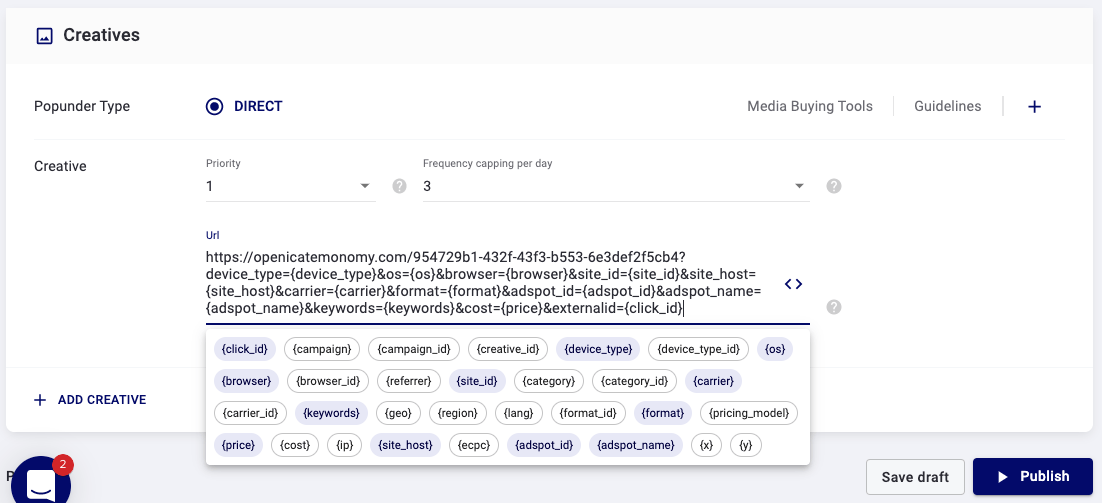
And the last step. We return to TrafficStars. On the last page of the campaign settings, you need to add the Voluum campaign URL. 💡 {click_id} token is a must in order to pass conversion information. As soon as the campaign is approved, the campaign will start receiving traffic and all data will be displayed in the tracker and TrafficStars statistics.
Conclusion: Setting up conversion tracking with Voluum on Traffic Stars is a seamless process that empowers advertisers to monitor and optimize their campaigns effectively. By following the outlined steps, you can ensure accurate tracking of conversions, enabling data-driven decisions and improved ROI. Proper integration not only enhances campaign performance but also provides valuable insights into audience behavior. For further assistance, Traffic Stars support is available to help you achieve a smooth and efficient tracking setup.
support@trafficstars.com
