This article offers a step-by-step guide on how to set up conversion tracking with Bemob on TrafficStars, ensuring you can monitor and refine your campaigns with precision.
✨ If you don’t have a Bemob account yet, then sign up and use promo code TRAFFICSTARS25 to get 25% OFF.
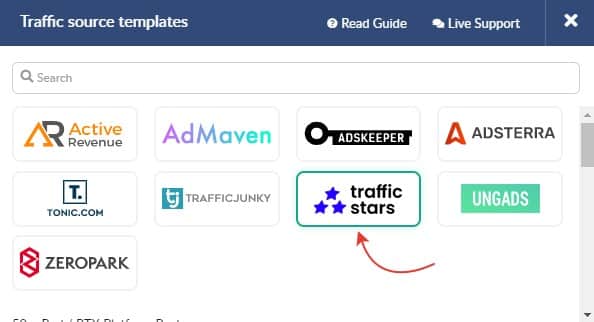
Step 1. Add TrafficStars to BeMob
Steps:
- Log in to BeMob.
- Select the Traffic Sources tab and click New from Template.
- Then select TrafficStars from the list and click Next.
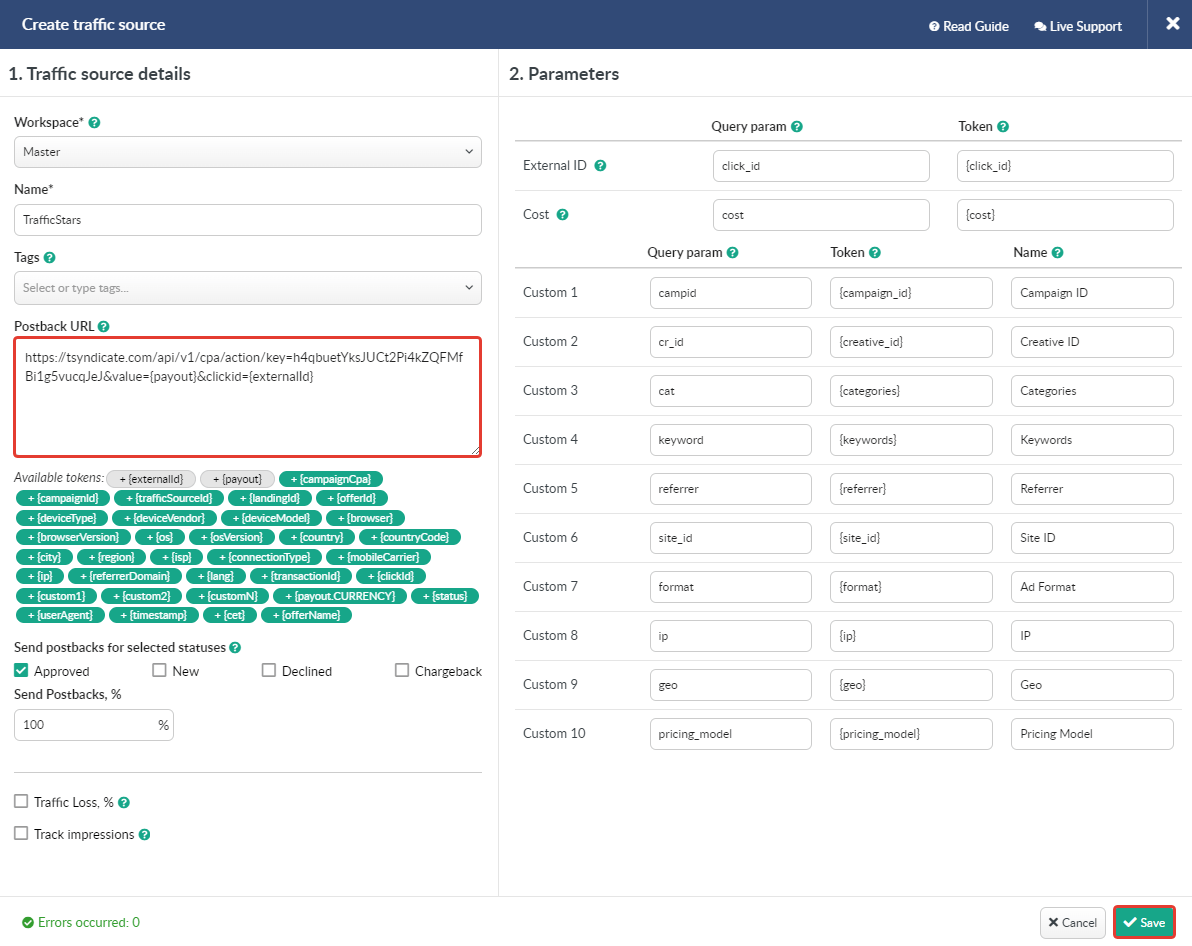
The screenshot below shows the TrafficStars settings as a traffic source with parameters and macros supported by our network. These parameters and macros are required to pass data about each click to your tracking link.
On the BeMob side, this data will be displayed in campaign reports. You will be able to optimize your advertising campaigns based on the received data on creatives, keywords, site IDs, etc.

The only thing that needs to be changed is the postback URL. This is necessary so that conversions are transferred from the tracker to TrafficStars correctly.
Step 2. Create postback URL in TrafficStars
Steps:
- Log in to TrafficStars and go to the Goals & Postbacks tab.
- Switch to Advanced mode and select all options.
- Select BeMob, enter a name and click Generate.
- Next, copy our postback and paste it into BeMob into the TrafficStars template.
- Click Save to save your traffic source settings for your future campaign.
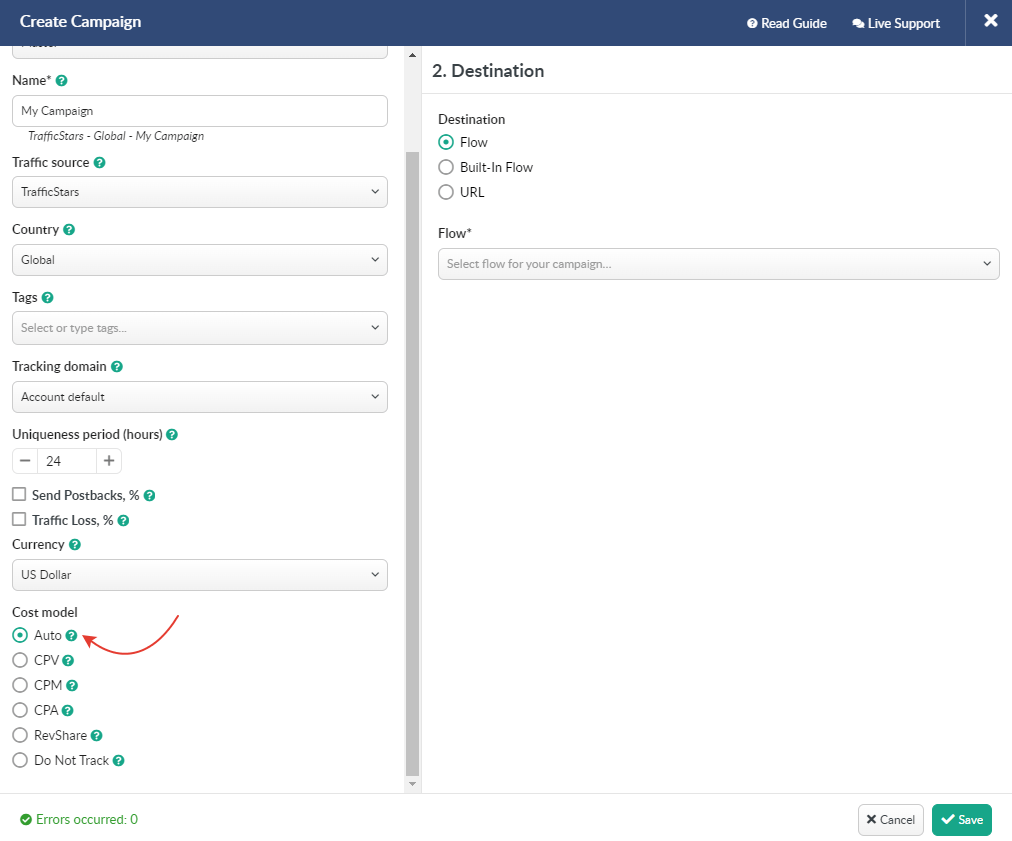
Step 3. Create campaign in BeMob
Steps:
- Select the Campaigns tab and click New.
- Select Workspace. If you are not using the Workspaces feature, then leave Master as the default. You can learn more about BeMob workspaces from the tracker documentation
- Enter a campaign name and select TrafficStars as your traffic source.
- Select the Auto cost model, as the costs will be transferred automatically through a special parameter in the campaign link.
- Next, select the campaign destination: Flow, Built-in Flow, or URL.
Detailed information about traffic destinations is available in the BeMob guide.
Save your campaign settings.
Copy the campaign URL. This link will be needed in the next step.

Step 4. Create campaign in TrafficStars
Go back to your TrafficStars account. On the last page of the campaign settings, you need to add the campaign URL.
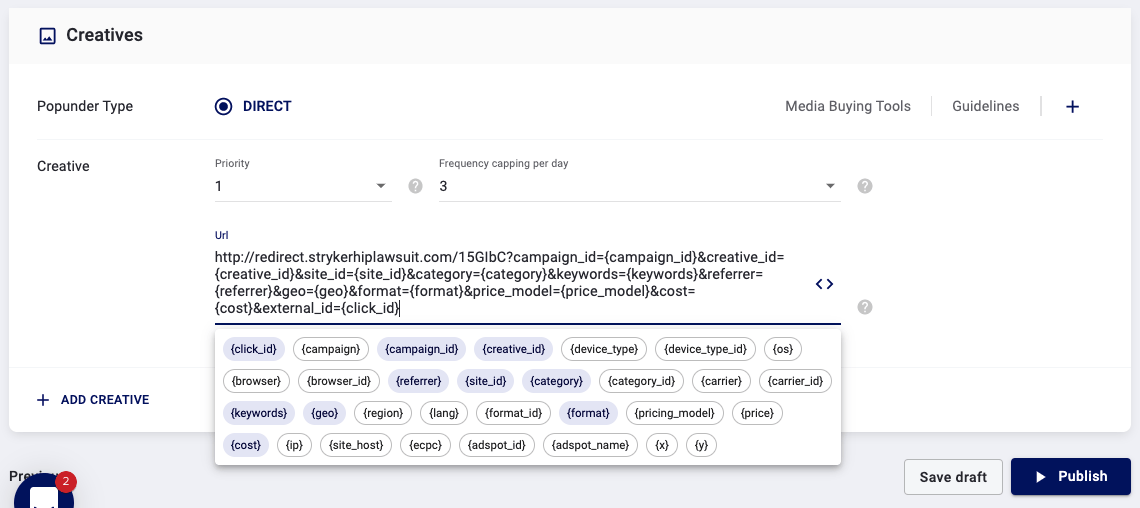
Add a link and click Publish. As soon as the campaign passes verification and moderation, you will see the first transitions on the side of TrafficStars and BeMob.
Affiliate network postback settings
Conversions will be transferred from BeMob to TrafficStars side after you set up conversion tracking with your affiliate network or direct advertiser. To do this, you need to use the Postback URL.
A detailed article on how to set up a postback with an affiliate network is available here.
If you are driving traffic to your own site, then conversion tracking must be set up through the Conversion Pixel.
All conversions that were sent to the TrafficStars side are available in the Postbacks tab.

Conclusion: By following the steps outlined in this guide, you can ensure accurate tracking of conversions, enabling data-driven decisions and improved campaign performance. Proper integration not only boosts ROI but also provides deeper insights into your audience and their behavior. If you encounter any challenges, TrafficStars’ support team is available to assist you in achieving a seamless and effective tracking setup.
support@trafficstars.com