Conversion tracking is a cornerstone of successful advertising campaigns, providing valuable insights into performance and ROI. For advertisers using PeerClick, a robust tracking platform, integrating it with Traffic Stars can unlock advanced tracking capabilities. This article provides a clear, step-by-step guide on how to set up conversion tracking with PeerClick on Traffic Stars, ensuring you can monitor and optimize your campaigns with precision and confidence.
✨ In case you don’t have a Peerclick account, then register by clicking the link and get 3 months for free.
Step 1. Add TrafficStars to Peerclick
How?
- Login to Peerclick.
- Select the Sources tab and then click +New.
- Next, select TrafficStars in the directory of traffic sources
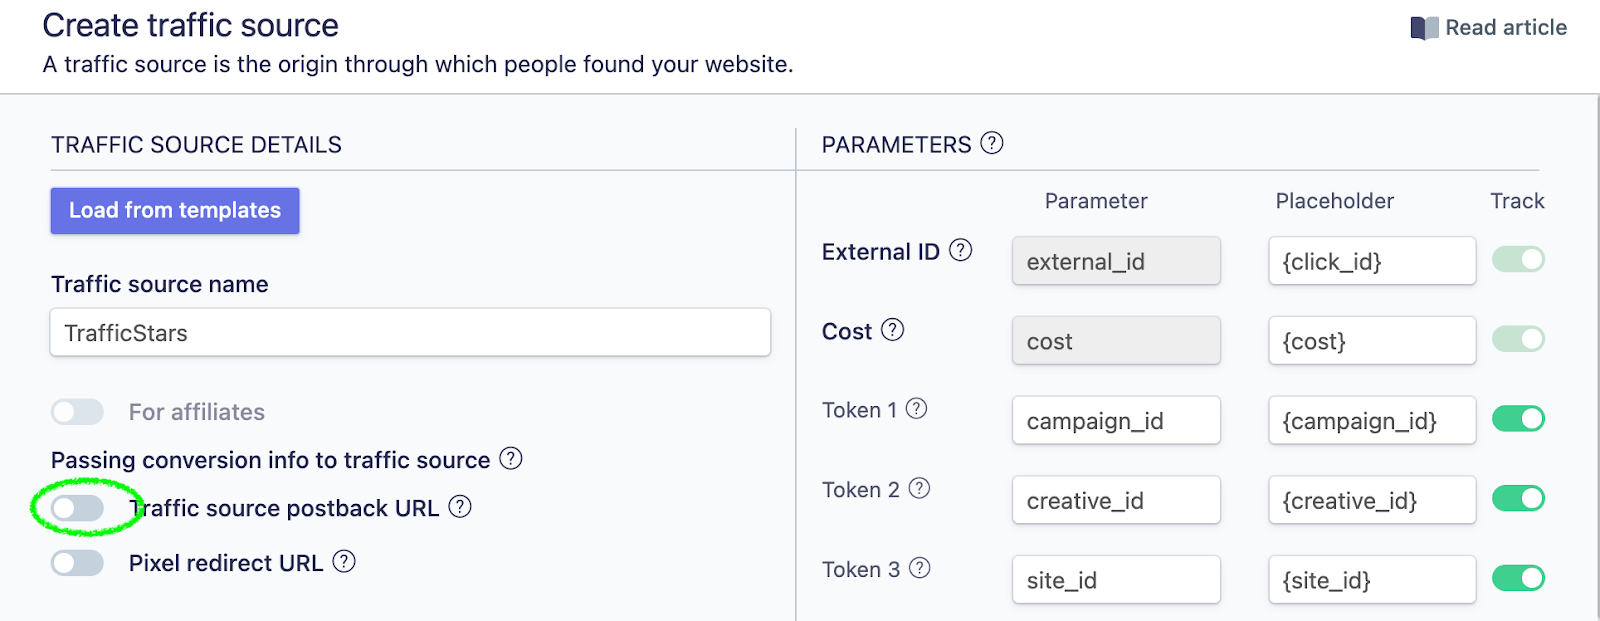
- This is how the traffic source settings look with all supported tracking options.
- The only thing that needs to be added is the postback.
Step 2. Create postback URL TrafficStars
How?
- Log in to TrafficStars, go to the Tracking Tools tab.
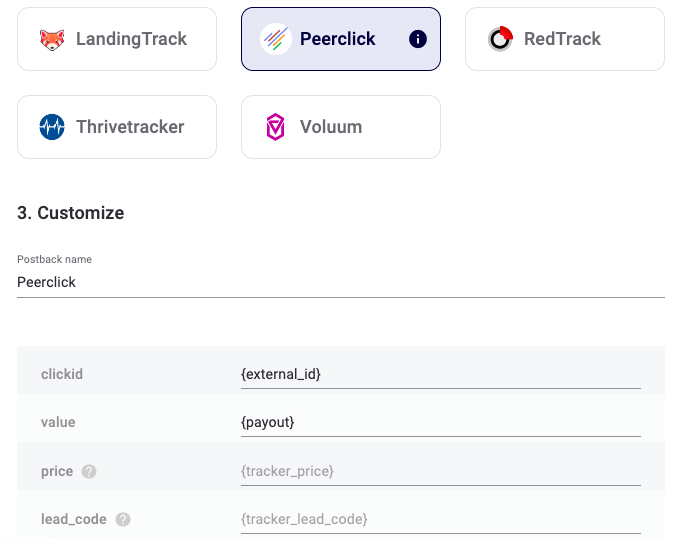
- Switch to Advanced mode and select all options.
- Select Peerclick, enter a name and click Generate.
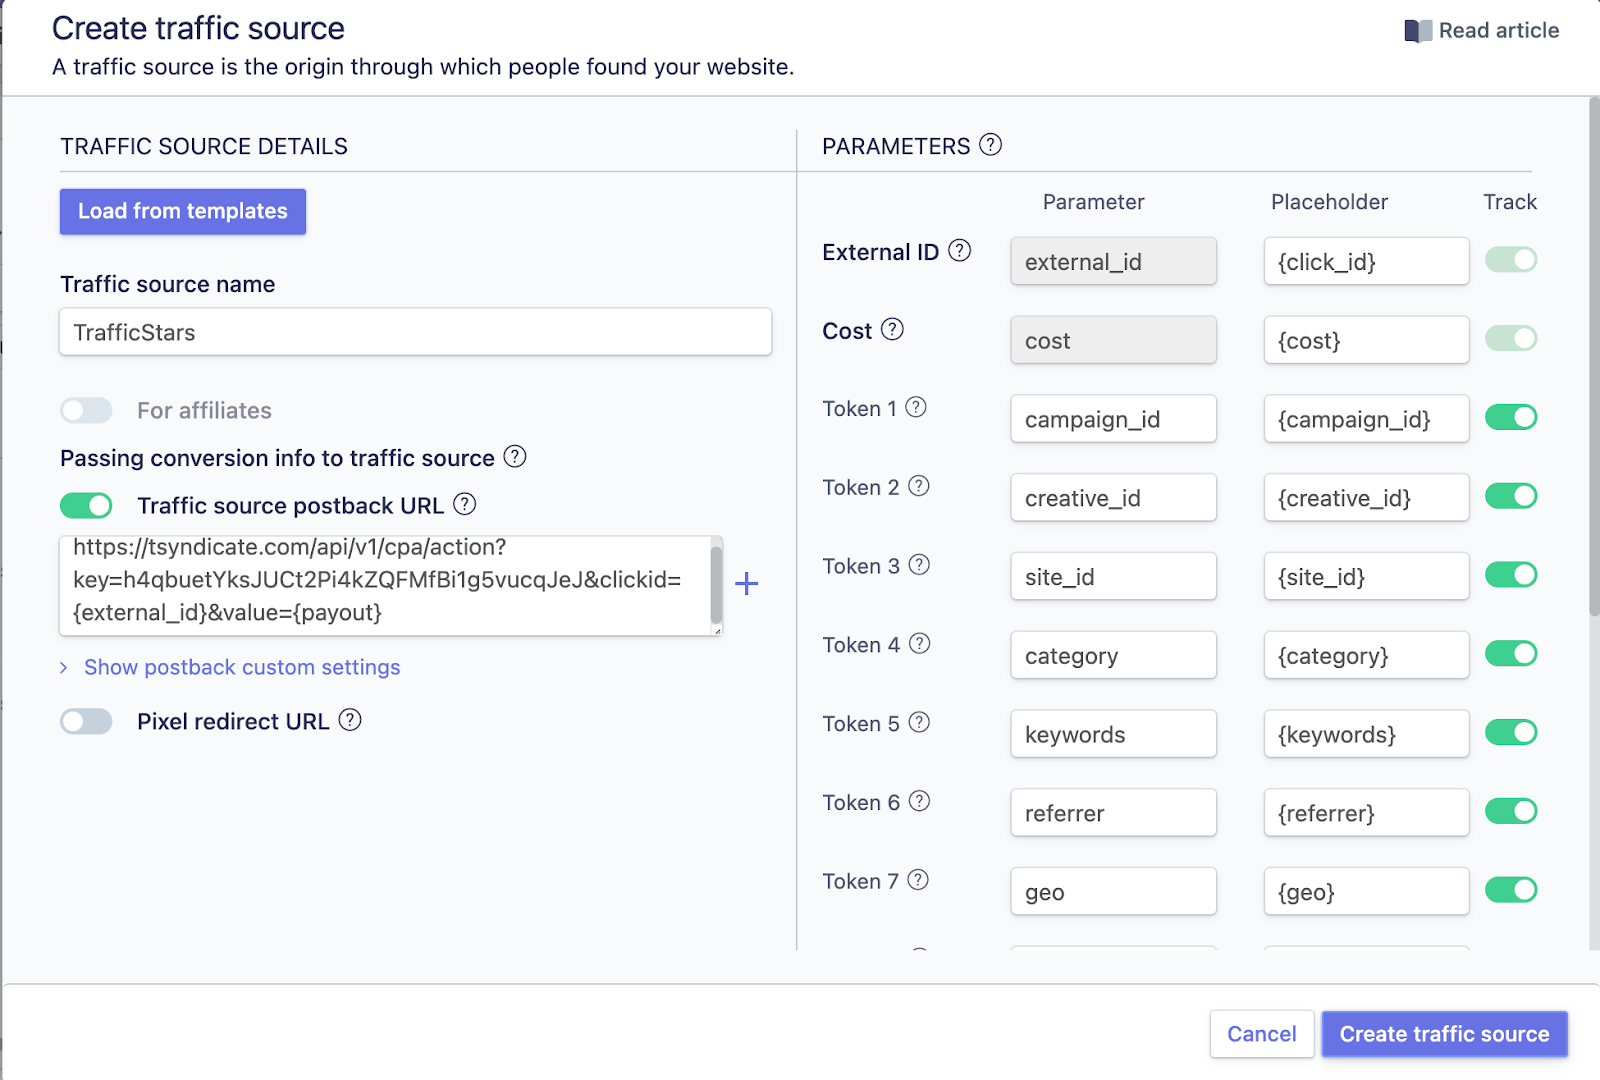
- Next, copy our postback and paste it into Peerclick.
- Click Create traffic source and TrafficStars will appear among traffic sources.
Step 3. Create campaign in Peerclick
How?
- Select the Campaigns tab and click New.
- Give the name of the campaign, select the country, offer and landing page (if required).
- If you don’t have a landing page, then select Direct linking.
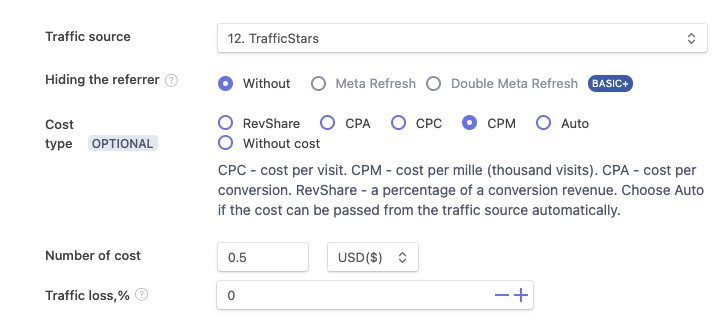
- Select TrafficStars as your traffic source.
- Select a payment model and price, if known. If not, you can add later.
- Click Create and close.
You can find out more about campaign settings in the Peerclick guide.
Copy the campaign URL. To do this, right-click on the campaign and select Copy link. We will need this link in the next step.
Step 4. Create campaign in TrafficStars
And the last step. We return to TrafficStars. On the last page of the campaign settings, you need to paste the URL of the Peerclick campaign.
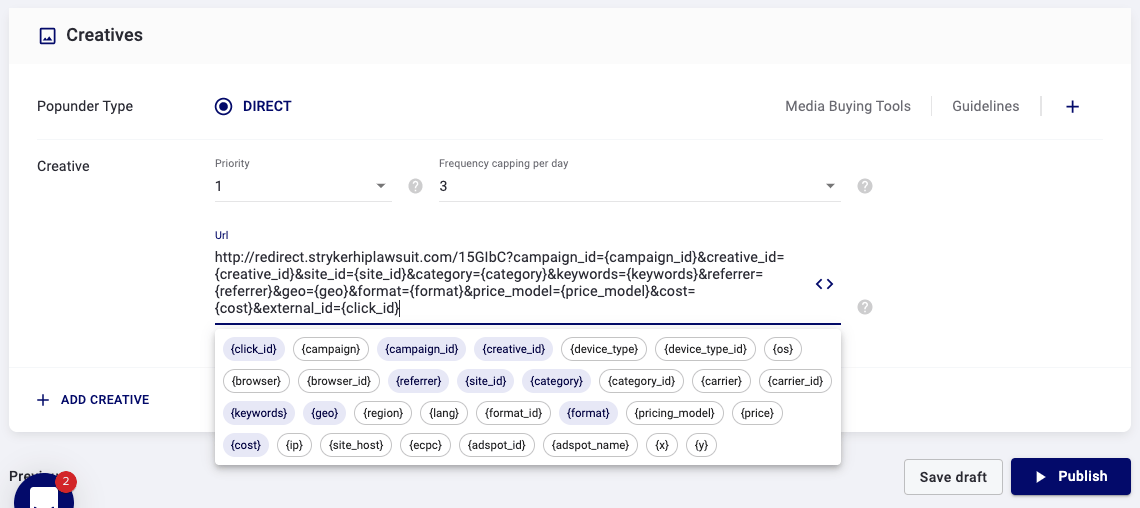
Paste the URL and click Publish. As soon as the campaign is approved, the campaign will start receiving traffic and all data will be displayed in the tracker and TrafficStars statistics.
Proper integration not only boosts ROI but also provides deeper insights into your audience and their behavior. If you encounter any challenges, Traffic Stars support is available to assist you in achieving a seamless and effective tracking setup.
support@trafficstars.com
