The optimal structure of ad campaigns
Creating new campaigns, starting to run a new offer, or testing a new traffic source, it is crucial to make a proper test to generate enough data to be able to make informed decisions when you launch profitable long-term campaigns. The results of the test campaigns will give you the information about sources of conversions/leads, good converting ad spots so that you can build upscale, non-converting ad spots so you don’t waste money on them, targeting options to focus on.
However, it is unobvious that purely RON campaigns are NOT the best solution for the start, as we have a massive inventory that should be tested wisely, with different bids and optimization approaches.
We strongly believe that well-structured campaigns will let you easily optimize marketing activities, as everything is neat and organized.
That’s why we recommend you to create 3 ad campaigns for each targeting:
Campaign #1 – xHamster.com domain only
With relevant bids, it will deliver massive volumes of top quality traffic to your campaign, and it should be optimized separately. Create a new campaign, go to the tab Audience. Add to the whitelist all xHamster spots, entering ID30 and 12. Click Edit to view the added sites.

💡 Set bid a bit higher than the recommended one to receive good volumes of traffic, sufficient to give you data for further optimization. Now you have your campaign setup for testing purely xHamster. Save it and it will go for approval.
Campaign #2 – Test only direct inventory, excluding xHamster domain
Repeat campaign creation and select RON type in the “Audience” tab. Check Blacklist in the Site ID field and add domains 12, 30 (those are xHamster domains, we already created a separate campaign for it).

Get to the “Traffic Source” field, click on the “Custom” tab and select “Direct Inventory”.

💡 The bid can be a bit lower than for the xHamster campaign, but still high enough to test good quality websites. Now you have your targeting setup for direct website inventory only, save it and it will go for approval.
Campaign #3 – Test our partner networks traffic
Repeat campaign creation and select RON type in the “Audience” tab. Get straight away to the “Traffic Source” field, click on the “Custom” tab and select “Partner Networks” - Publisher has a group of websites, but all these websites traffic is coming from 1 registered domain (ex: trafficnetwork.com). Direct Inventory - Traffic is coming from one exact domain and/or it’s mirrors.

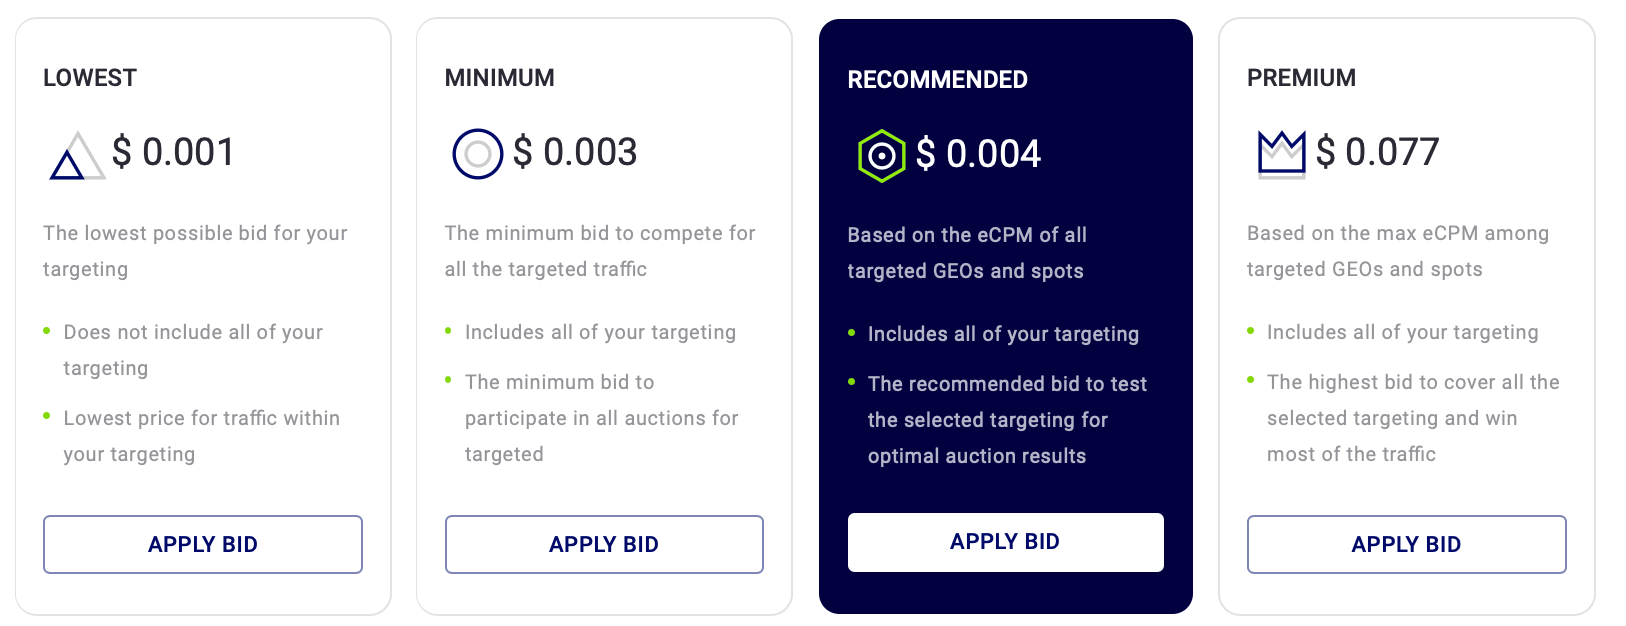
💡 It is better to set up the bid slightly higher than the minimum one. Now you have your targeting setup for partner networks inventory, save it and it will go for approval. Once you choose the settings of your ad campaign and open the “Pricing” tab you will see 4 bidding options:

💡 THE RECOMMENDED – is an optimal bid, based on your targeting and competition.
Set up tracking
Make sure you have tracking set up so you can optimize your campaigns easily and fast. We use Server to Server (S2S) tracking, so you can easily see all your leads in your campaign stats, and identify where these leads are coming from. We've integrated with the most popular tracking platforms.
Quick start guide
Note:
- 🚀 Create campaign. To set up your first campaign all you have to do is click here and follow this step by step guide with targeting tips.
- 📘 Follow our advertising guidelines. Read our Guidelines to get your campaign approved. Once you have created your campaign and your account is funded, our compliance department will check it, and if approved, the campaign will automatically start running and receiving traffic. Otherwise, you will receive an email explaining why your campaign or creatives were rejected.
- 💰 Funds. Don’t forget to top up your account to start getting traffic.
- 📊 Campaign optimization. Take advantage of our Optimizer. Using this tool, you'll be able to set up rules to automatically blacklist under-performing sources.
- 👩💻 Account manager. To reach the best possible results, please let your account manager know more about your business so he/she can provide the suggestions for your first campaigns.
Don’t hesitate to contact your personal manager through our platform. Let's take your business to the next level together!
support@trafficstars.com
