
In our recent article about the Optimizer, we delved into the importance of using this tool for automatic campaign optimization on TrafficStars. In this guide, you will learn about another way to save time and budget, making testing new offers significantly easier. But let's start with the basics: what is CPA payment and how to pass conversions.
What is a CPA model?
As some of you may be aware, the abbreviation CPA stands for Cost Per Action, meaning "payment for action". In a broad sense, the CPA formula is the total cost of the campaign divided by a number of conversions. So what is CPA in this context? We’re talking about the CPA payment model. In TrafficStars advertisers can pay for CPA leads at the desired price, at which they will have a positive ROI. But to achieve this, certain conditions need to be met. And let's start with setting up conversion tracking in TrafficStars using S2S Postback.
Setting up conversion tracking through postback
To obtain information about leads in TrafficStars and optimize traffic in the future, it is necessary to set up conversion tracking. This can be done using postback.
🔄 Conversion Tracking with TrafficStars Tools
You can set up integration directly between the affiliate network and TrafficStars, or transmit information through a tracker:
TrafficStars ⇄ Third-party tracker ⇄ Affiliate network
TrafficStars ⇄ Affiliate network / In-house tracker
In the first option, you need to set up tracking between TrafficStars and the tracker, as well as between the tracker and the affiliate network. Keep in mind that each platform has unique parameters that need to be considered when setting up data transmission. TrafficStars is integrated with many popular trackers, which significantly simplifies the setup process.
In the second case, information about conversions is transmitted directly between TrafficStars and the CPA network (or your site's own tracker). Here is an example of setting it up.
To start setting up, go to the "Tracking tools" section and create a new postback URL. Select "Advanced," then - Track Earnings and ROI. This will allow us to transmit information about the value of the conversion.
![]() Next, choose a tracker or configure custom parameters.
Next, choose a tracker or configure custom parameters.
![]()
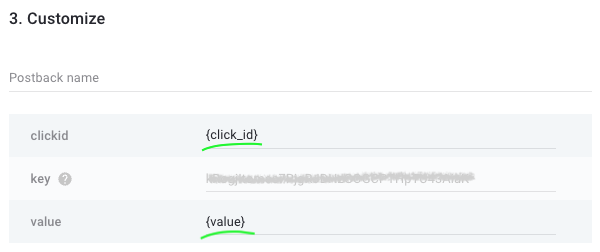
In the fields opposite clickid and value, enter the corresponding parameters of the tracker or affiliate program. These parameters are unique for each platform. They can be found in the FAQ section or obtained from a manager.
Click Save, copy the URL, and paste it into the settings of the affiliate program/tracker.
![]()
Great, the postback is configured! Now let's move on to setting up the CPA campaign.
Setting up CPA campaign
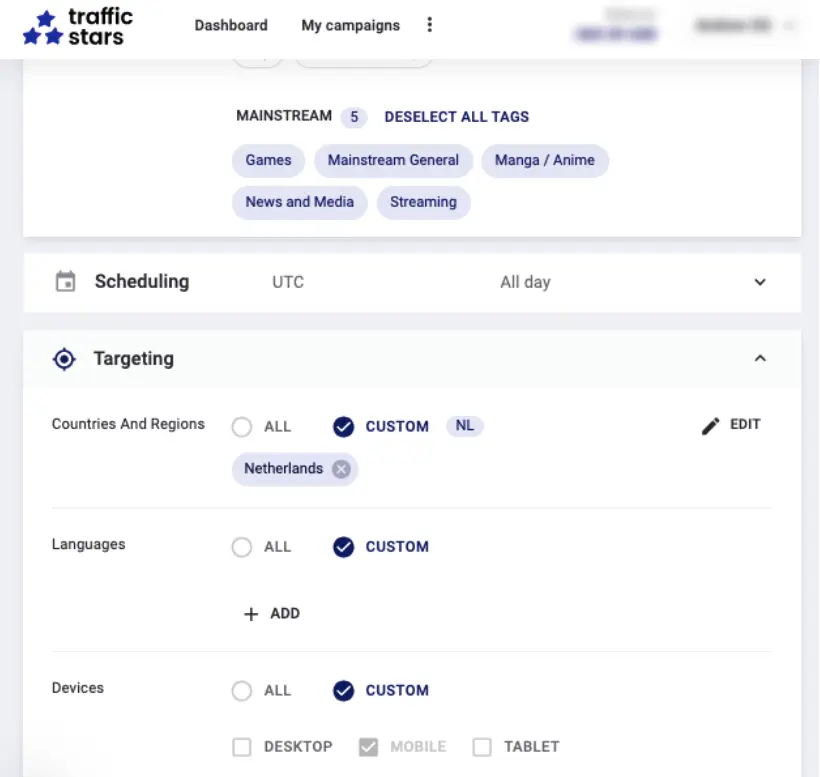
Let's imagine that we are promoting a dating offer with the following parameters:
- Offer: Dating (SOI)
- Geo: Netherlands
- Target: Mobile devices
- Payout per conversion: $3
Now that we have all the input data, ready technical integration, and everything necessary for setting up the CPA advertising campaign.
Click on Create campaign and proceed to the settings. Here, specify all the necessary targeting parameters: advertising format, geo, device type, language, etc., according to your offer.
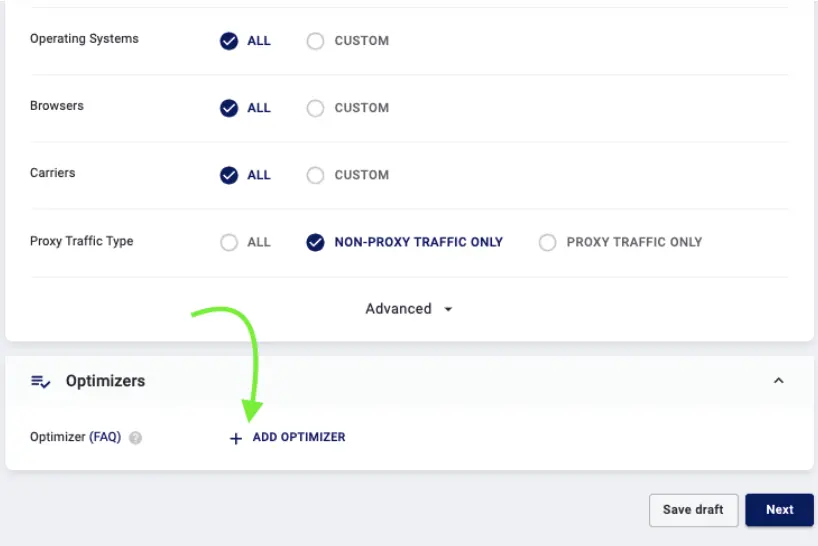
At the bottom of the screen, you can find the Optimizer. When launching CPA campaigns, you can use it to block inefficient traffic sources. The Optimizer can be added at any time, even to campaigns that are already running.
The next step is Audience and Pricing. Choose the desired type of traffic: RON, PRIME, or MEMBER AREA.

Then select the CPA model.
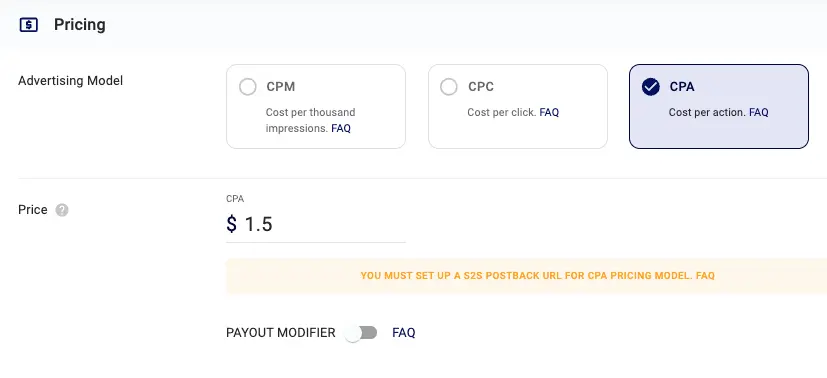
The next important step is to determine the target CPA, i.e. price you are willing to pay TrafficStars per conversion.
There are a total of 3 payment methods for conversions:
- Field Price. In this case, it is sufficient to specify the cost of the conversion and pass the click_id in the postback.
- Price parameter passed through the postback.
- Value parameter passed through the postback and configured Payout modifier.
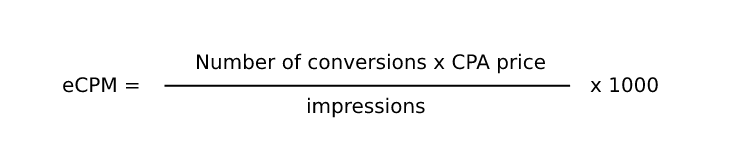
If all 3 methods of transmitting conversions are specified, then the Price parameter from the postback will be prioritized. This infographic clearly demonstrates how the choice of payment via CPA works.
Suppose you have chosen the third method, then you need to set up the Payout Modifier. The tool is intuitive: if you want to achieve a 100% ROI, then you need to select 50% in the slider.

Budget
The budget to set for testing depends on the number of spots and GEOs in the campaign, as well as the CPM. The higher these values are, the larger the amount needed for testing. However, in any case, the testing budget cannot be less than $50.
Creatives and URL
And finally, the final part - uploading creatives and links.
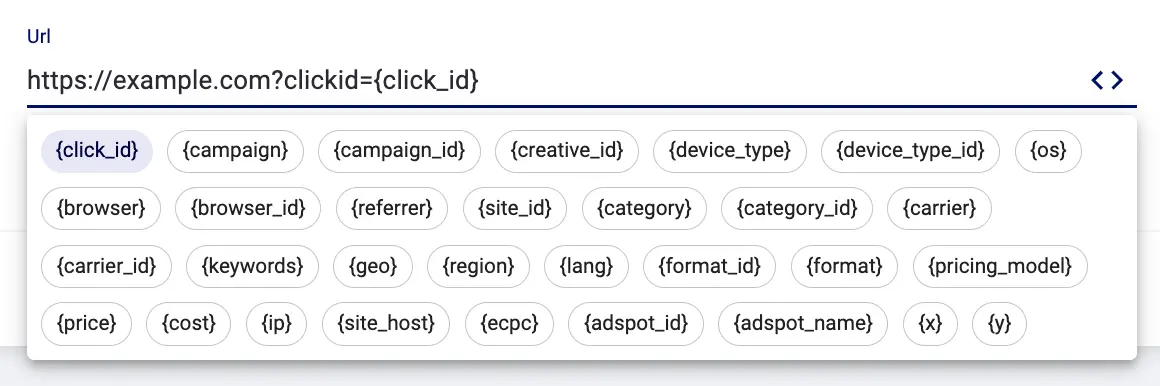
The most important parameter is {click_id}, as it conveys the fact of receiving a conversion. The other parameters are optional.
So, we've figured out how to set up a CPA campaign and transmit conversions via postback. Now, let's delve into the details of how the CPA model works to understand its operating principles and make the most of its capabilities.
СРА model in TrafficStars: How does it work?
When working with the CPA payment model in TrafficStars, it is important to understand how it operates in order to acquire CPA leads at the desired price.
1. Setup and Moderation
You create an advertising campaign, choosing the CPA payment model, after which it undergoes moderation.
2. Testing Period
The campaign receives traffic based on the eCPM (recommended bid) for the selected zone (spot + GEO). The system automatically generates a bid to ensure the campaign enters rotation and receives traffic. During this period, the system tests your combination, selecting combinations to achieve the desired price per lead. Payment is made for impressions and conversions, temporarily increasing the cost per lead.
3. Post-testing Period
Once the system finds suitable spots and parameters for your combination, it switches payment to a mode where payment is only made for conversions. At the same time, it assigns the campaign eCPM bids calculated for each zone (GEO + Spot) based on eCPA and the number of conversions over the last 7 days.
Important Points:
🔹 Traffic from the zone (GEO+spot) will stop if the eCPM (over the last 7 days) is less than the minimum bid.
🔹 The campaign will be stopped if the number of impressions over the last 7 days for each segment is less than 30.
Tips and Recommendations
1. Geotargeting Setup: To achieve the most accurate test results, create a separate campaign for each geo-location.
2. Stability of Settings: Avoid making changes to campaign settings after launch. Changes may lead to restarting the test period.
3. Optimal Budget: The minimum test budget is $50. Increase the budget for broad targeting or high CPA.
4. Variety of Creatives: Test a variety of creatives within a single campaign. This is especially important if you don't have proven creatives and approaches.
5. Results Analysis: If there are no conversions after the test period, check the correctness of the postback settings. If the settings are correct, try running the campaign with different creatives, landing pages, or offers.
By following these recommendations, you can optimize the test period and minimize the CPA campaign expenses.
Summing Up
Today we have thoroughly examined another working method with which you can save your time and budget. Do not ignore the innovations that can help you with your routine and unload your working time. The saved time can be directed to new projects and bundles. Test, experiment and gain new experience and a positive result will not keep you waiting long. TrafficStars was with you, see you soon!


.png)

.jpg)